Picture tutorial for Colouring with reds and Polychromos pencils
The image i am using is one of the new christmas magnolia images she is very cute and just calling to be coloured ~I decided to colour her red as I know this is one of the hardest colours to colour and blend.
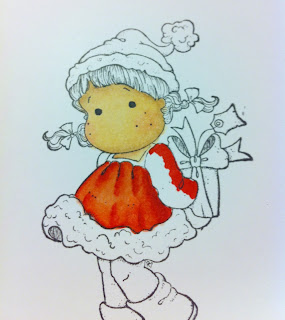
I will start by colouring the skin I used E13, E11 E00 (not E31 as in pic derr)
I chose where my light sorce was coming from which is the right hand side but it is totally up to you.
the first colour I used is E13
I then added E11 and blended it with E13
I then added E00 and blended all over
I added R20 to the cheeks
Then reblended with E00
For the red dress I used R29, R22, R20 I find this the best combo for christmassy colour's
Using R29 first I added the darkest colour to the right side of her dress and to the folds
I then blended with R22 then R20, I go over this a couple of time to get the blend I am happy with.
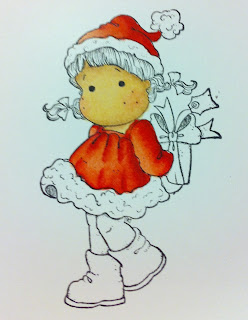
I have done the same for the sleeve and the rest of the dress
I used the same blending colours on the hat and neckline
For the legs and hands I used the same skin combo as the face.
For the boots I used C00, C1, C3, C5
Starting with the darkest C5 colour first
The blending in the other greys
For the ribbon I used the same copics as the Dress
For the Hair I used copics E18, E17 YR21
Starting with the darkest colour add to where you think is likely to be the darkest areas in the folds of the hair
The add the other colours med then the lighest colours repeat to get the blend how you want it, it doesnt matter how many times you go over it will blend better the more you add colour.
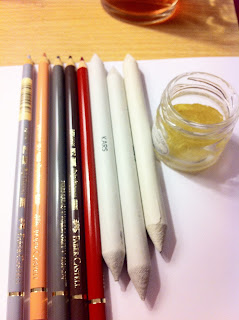
I have now finished with the copics and want to add so me blending for more depth with polychromos pencils and sansador the colours I used are Dark Red, Walnut Brown, Warm Grey V, Cold Grey II and cinnamon.
I used the dark red to add depth to the folds
Sleeves
Using the dark brown I added it to the hair in the folds
Then blended with a blending stump
The cinnamon I used just under the hairline
and the jaw line
again blending it with the stump
do the same on the hands and legs
now the warm grey V on the boots
to the darkest areas
Then blend it with a stump and sansador
the cool grey II is used on the folds of the fir
blend them to finish
and R20, R22 to finish the parcel
and there you go the finished image I will make a card with the image and post it here to. Hope you enjoyed this tut and it helps in showing how to colour reds.


Thank you for the great tutorial, Wendy!!! Your Tilda looks fantastic! I have just started using Polychromos and I am very happy to see how other crafters use them too:-)! Have a lovely weekend! Hugs Delphine xx
ReplyDeleteJust gorgeous! Thx for the tute Wendy - I don't use pencils for depth but will give it a go now!
ReplyDeletehi I am just starting to use copics 'properly' so your tutorial is invaluable to me. Thank you so much for the fabulous tips. Best wishes, Jill
ReplyDeleteThank you for the great tutorial,
ReplyDeletehugs Adriana
http://cardsfromproudgranny.blogspot.com/
Wow, what a great tutorial! I never thought to use the Copics and pencils together but the result is fantastic!
ReplyDelete-Ann M
Hiya Wendy
ReplyDeleteRuthie here - you will have a fabulous time on the weekend - I went last year (er yeah, the pictures!) and had a blast! It will be lovely to meet you
AND your work is fabulous! I bought a set of copics after playing with someone's on the crafty weekend so your tutorial has been really fabby!
thanks
Rx
You have worked so hard on this Wendy and it is beautiful.
ReplyDeleteMany thanks for taking the time to share this with us.
Hugs
Chris x
Gorgeous.. lovely colouring.. Hugs, Brittany, xoxo
ReplyDeletehttp://www.mymagnoliacardsbybrittany.blogspot.co.uk/
Wow Wendy your colouring is fantastic , if only I could ...its taking time ,I just started blogging in February and have only since then taken up colouring, I used to use toppers etc and CD crafting before blogging came about. I am now having so much fun, spent a fortune on pens mind you but I am content , Thank you for the tutorial I shall come back for a refresher soon Hugs Elaine
ReplyDeleteThankyou for a great tutorial. I will be back. Hugs Sheila.xx
ReplyDelete